Production Process For IV set/Burette set/Blood set/Scalp vein set
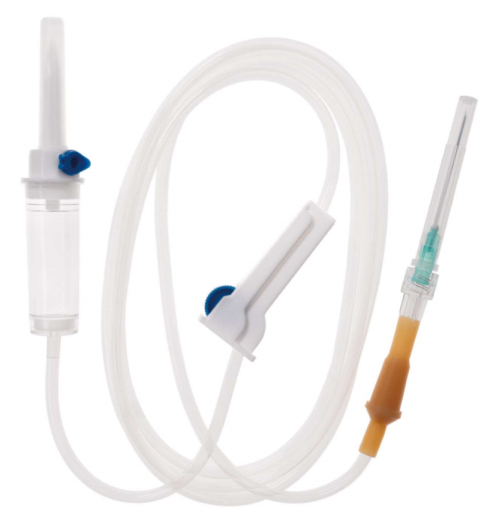
The Whole Production Process for IV sets
Benefits of Automation in IV Set Assembly:
In earlier times, before assembly machines became widely used, people used to assemble the IV administration set by hand. However, relying on human operators presented a few challenges. These included slower and inconsistent production rates, an increased risk of product exposure to diseases, and the potential for finger injuries over time due to repetitive movements.
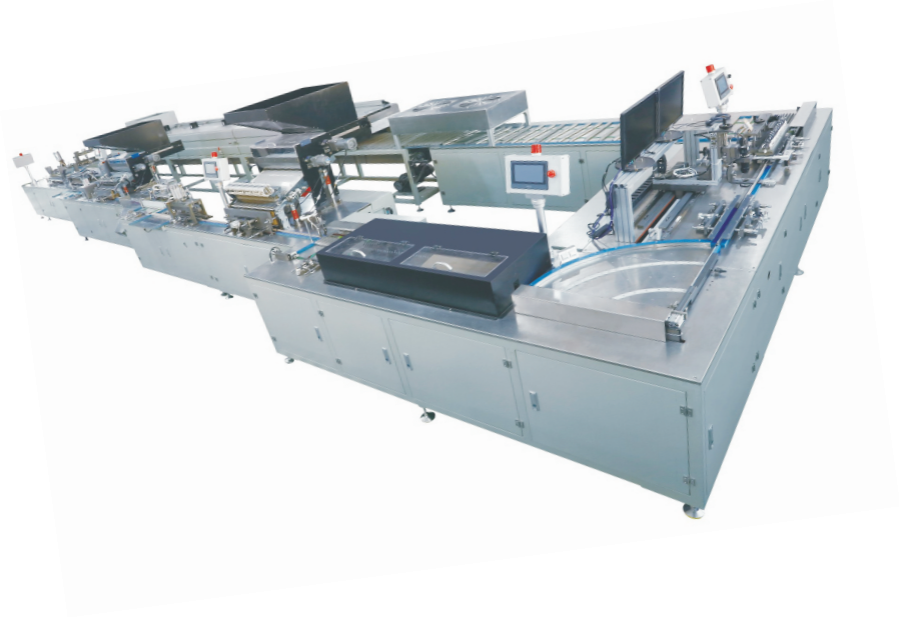
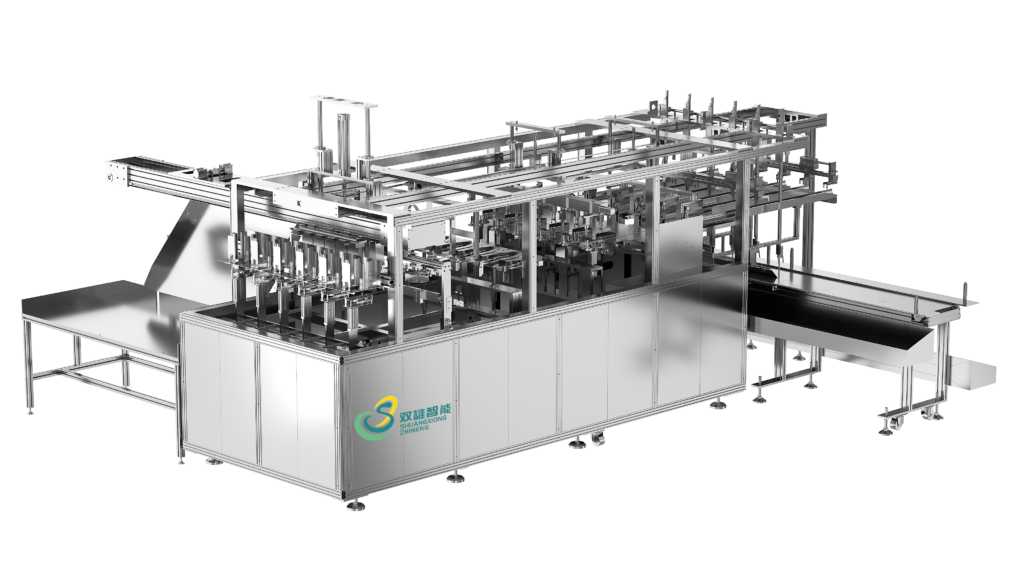
Today, manufacturing companies are striving to enhance efficiency and productivity to stay competitive. Automatic IV set assembly and production line machines are now used to assemble most parts, and these assembled parts are then integrated into a complete IV drip set. This task is characterized by high speed, high yield, and a strong focus on safety. The picture shows the whole production line of an IV infusion set by machine, including the assembly of the fluid filter, the assembly of the drip chamber with spike, the assembly of the roller clamp, the assembly of the injection port, and the assembly of the IV tubing.
The transition from manual to automated assembly of IV administration sets reflects significant advancements in manufacturing technology, particularly in the medical device industry. The benefits of automation, such as increased speed, consistency, and safety, are especially crucial in the context of healthcare. Here’s a summary of the key benefits and processes in the modern automated IV set assembly:
Benefits of Automation in IV Set Assembly:
Increased Speed and Yield: Machines can operate continuously and at a much higher speed than human workers, ensuring a higher production rate and better meeting market demand.
Consistency and Quality Control: Automation ensures that each IV set is assembled with precision, reducing human error and variations in the final product.
Safety: Automated systems help reduce the risks of contamination, as there is less direct human interaction with the components, reducing the chances of exposure to disease or infection.
Reduced Worker Injury: By eliminating repetitive manual assembly tasks, the risk of ergonomic injuries or strain, such as finger injuries, is minimized.
Cost Efficiency: Over time, automated systems can reduce labor costs and improve overall profitability by maximizing output.
Key Steps in IV Set Assembly:
Fluid Filter Assembly: A critical step to ensure that fluids entering the IV line are free of particles or contaminants.
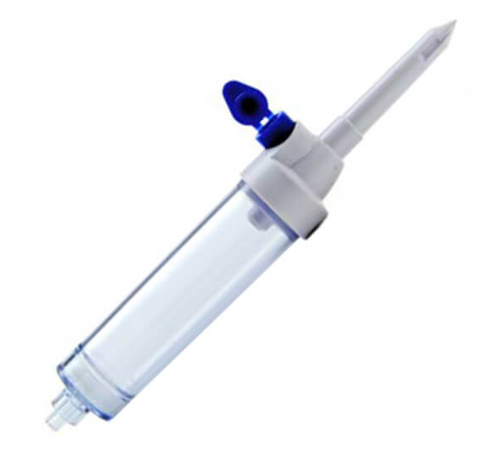
Drip Chamber and Spike Assembly: The drip chamber allows healthcare professionals to monitor the flow rate of fluids, while the spike is used to pierce the fluid bag or bottle.
Roller Clamp Assembly: The roller clamp regulates the flow of fluid through the tubing, giving medical staff control over the rate of infusion.
Injection Port Assembly: This port allows for the safe introduction of medications into the IV line without removing the IV set or compromising the sterile field.
IV Tubing Assembly: The tubing itself connects the entire system, ensuring that fluid is delivered from the source to the patient.
In summary, these advancements have made the production of IV administration sets more efficient and safer, providing critical medical supplies in a way that meets modern healthcare standards.
Production Process:
Injection Process for Each Plastic Parts
Injection Molding Process for IV Parts
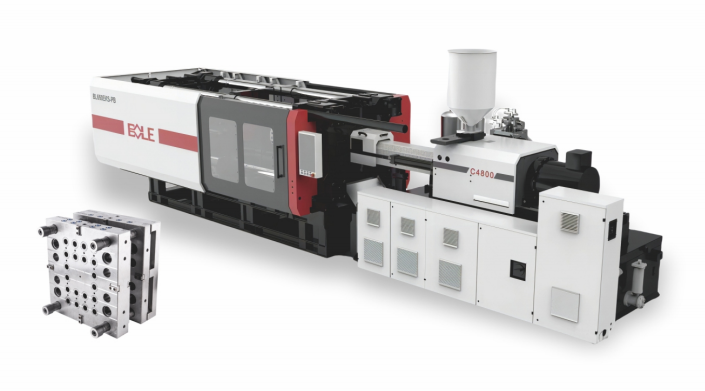
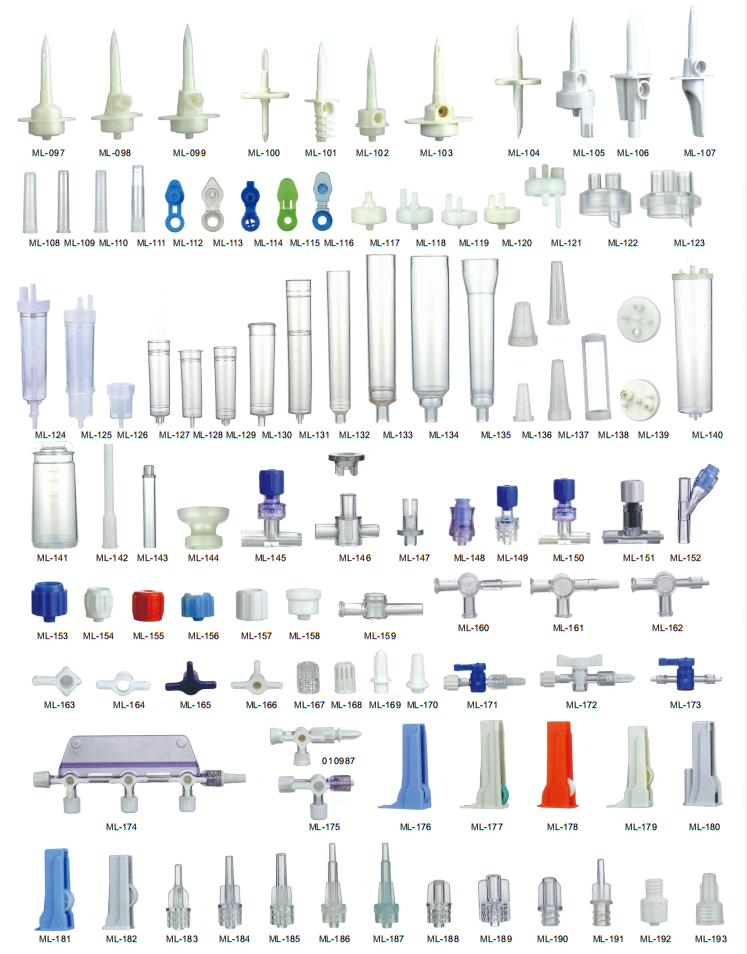
Injection molding is a critical step in producing high-precision components for IV sets, including spike caps, spikes, chambers, filter frames, air vent caps, clamps, rollers, luer connectors, needle seats, and needle caps. Here is a detailed breakdown of the process:
1. Preparation of Raw Materials
Material Selection: Medical-grade plastics such as Polypropylene (PP), Polyvinyl Chloride (PVC), or Acrylonitrile Butadiene Styrene (ABS) are chosen for their durability, biocompatibility, and chemical resistance.
Material Drying: Plastic granules are dried to eliminate moisture, which could cause defects during molding.
2. Injection Molding Process
Step 1: Feeding
Plastic granules are fed into the hopper of the injection molding machine.
The granules are conveyed to the barrel via a screw mechanism.
Step 2: Melting
The plastic granules are melted in the barrel under controlled heating (temperature depends on the material, e.g., 180–240°C for PP).
Step 3: Injection
The molten plastic is injected into pre-designed molds at high pressure (e.g., 500–2000 bar) to fill all cavities, ensuring precise shapes and details.
Step 4: Cooling
Once the plastic fills the mold, cooling channels within the mold regulate the temperature to solidify the parts.
Step 5: Ejection
Solidified parts are ejected from the mold using ejector pins, ensuring they maintain their shape.
3. Mold Design for IV Parts
Spike Cap and Spike:
Designed with high precision to ensure compatibility with IV fluid bags and prevent leakage.
Drip Chamber and Filter Frame:
Transparent materials like medical-grade PVC are used for the drip chamber to allow fluid monitoring.
Fine tolerances ensure a secure fit for the filter frame.
Air Vent Cap:
Includes micro-perforations or membranes for controlled air exchange while maintaining sterility.
Clamp and Roller:
Molded with specific ergonomic designs to facilitate smooth fluid flow regulation.
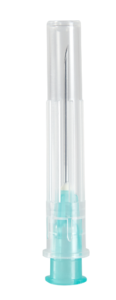
Luer Connector, Needle Seat, and Needle Cap:
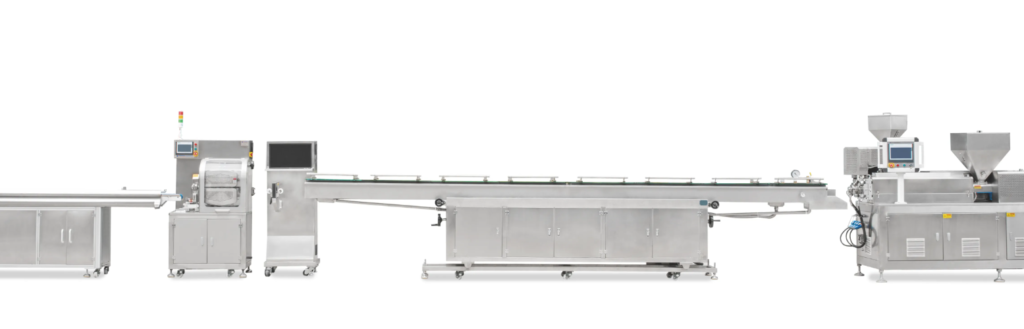
Extruded and Cutting for Plastiv Tube
1. Material Selection
Common Materials: Polyvinyl Chloride (PVC), Polypropylene (PP), Polyethylene (PE), Thermoplastic Elastomers (TPE), and Silicone.
Properties Required: Medical-grade, biocompatible, sterilizable, durable, and flexible.
2. Plastic Extrusion Process
a. Preparation of Material
Plastic granules or resin are dried to remove moisture, ensuring consistent quality.
Additives like plasticizers, stabilizers, or colorants may be included.
b. Extrusion Setup
Extruder: A machine that consists of a hopper, barrel, screw, and die.
Die Design: A precision die shapes the molten material into a hollow tubular form.
c. Extrusion Steps
Feeding: Resin is fed into the extruder.
Melting: The resin is melted through heat and mechanical shearing.
Shaping: The molten material is pushed through the die to form the tube.
Cooling: The tube is cooled using a water bath or air cooling to solidify its shape.
Pulling: A puller maintains tension and ensures a consistent extrusion speed.
d. Quality Control
Inline monitoring systems check dimensions, wall thickness, and surface finish.
Calibration devices ensure the tube diameter and roundness.
3. Cutting Process
Objective: Cut the extruded tube to the required length with precise tolerances.
a. Cutting Machines
Rotary Cutters: Use rotating blades for high-speed, clean cuts.
Laser Cutters: Provide precise, burr-free edges (suitable for high accuracy needs).
Guillotine Cutters: Use a linear blade for simple cuts.
b. Automation
Tubes are cut in line with the extrusion process to minimize handling.
Automated systems measure and cut tubes at predetermined intervals.
c. Post-Cutting Inspection
Cut tubes are inspected for length accuracy, edge quality, and cleanliness.
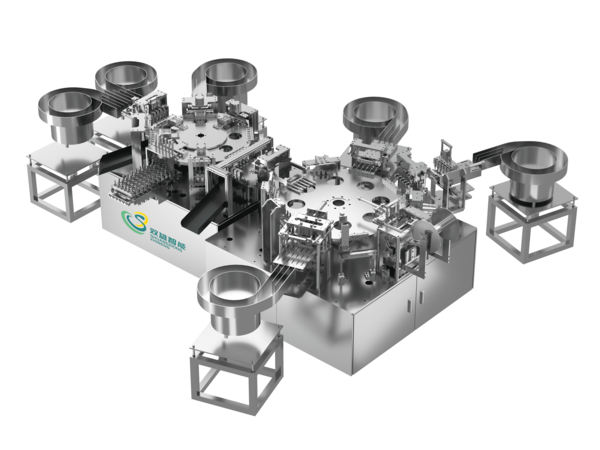
ASSEBLY PROCESS
1. Filling film into filter By Filter film Machine
If you have whole assembly machine, once assembly chamber and take it as one part, u could use whole assembly machine to assembly each part, such as Chamber assemblied, PVC tube, rollor , Clamp, Rubber port, lock or slip Connector, Needle assemblied with cap.
If you do not have whole assembly machine, maybe u need assembly machine for Regulator( Rollor and Clamp), Assembly Machine for Rubber and Connector or Assembly machine for Y port .
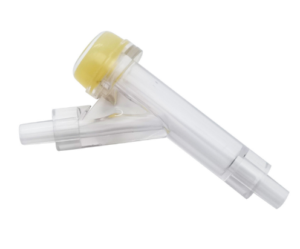
5. Assembly Machine for Y port
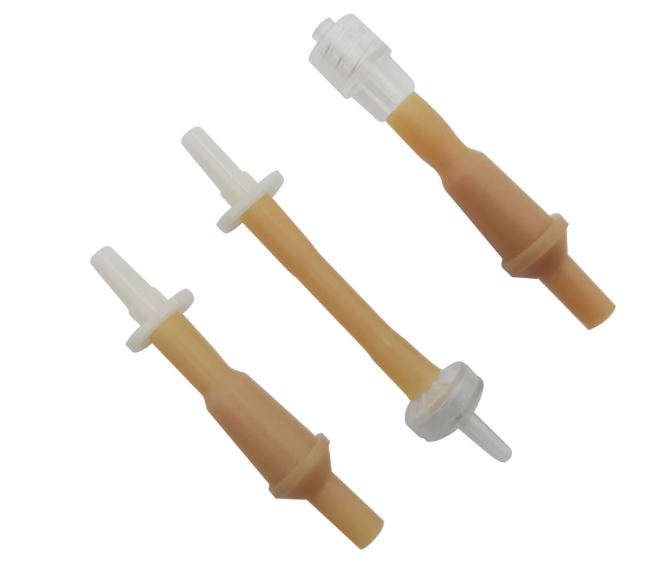
6. Assembly Machine for Rubber and Connector
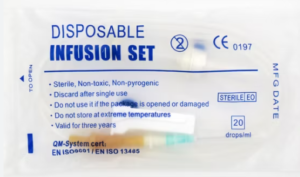
AUTO PACKING PROCESS
STERILIZATION BY E.O.Gas
After sterilization, please stock the cargos in warehouse, and after releasing ethylene oxide, could load cargos for delivery.
not only supply Machine,We also supply free solution and Technical support